
Tonight, I'm at my church sharing a few inexpensive gifts you can make for friends and neighbors.


CANDY CANE SOUP

This Candy Cane Soup comes from Organized Christmas and is a family-sized gift of hot chocolate mix. You can follow the website's step-by-step directions and also download adorable printed tags. I also like to attach a candy cane and include the legend of the Candy Cane from Home Schooled Kids:
The true meaning of the Candy Cane
Look at the Candy Cane What do you see? Stripes that are red Like the blood shed for me |
|

White is for my Savior
Who's sinless and pure!
"J" is for Jesus My Lord, that's for sure!

| Turn it around And a staff you will see Jesus my shepherd Was born for Me! |
DOG BISCUITS

Last year, we gave our neighbors delicious Peanut Butter Dog Biscuits. My favorite recipe is from Paula Deen HERE, but there are any number of yummy recipes to be found.
I like to wrap a stack of six with a red ribbon (paw-print embellished is even better) and then give several stacks to neighbors and friends.

CHOCOLATE SPOONS
I posted my spoons a few years ago but it deserves a re-post:
Easy Gift - Chocolate Spoons
Here's a quick and easy gift idea for you. I made spoons like these for my nursery volunteers last week, and my co-CB Michelle brought in the wrappings and tags.

- Two bags Candy Melts or Bark, one milk chocolate and one white chocolate (I had extra from my Red Velvet Cake Balls so used those)
- Candy Sprinkles or Baking Sugar
- 30-40 Heavy duty plastic spoons (I bought the multi-pack at Kmart for $6; I could have bought 300 for $10 at Costco, but I couldn't stand the thought of owning 300 spoons)
- Waxed Paper or Roul-Pat
- Cellophane bags or wrap
- Coordinating ribbon
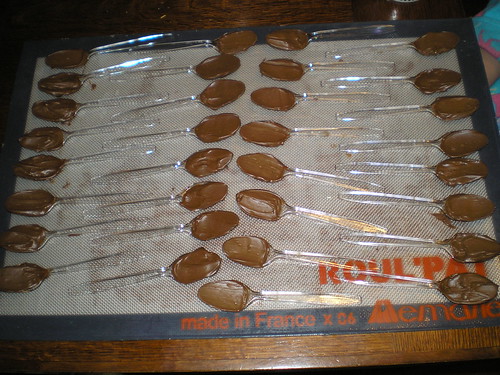
1. Lay out the Roul-Pat or waxed paper on large flat surface - my dining table was perfect since my counter space is non-existent.
2. In a microwaveable bowl, melt the milk chocolate candy according to manufacturers directions or use a double boiler.
3. Scoop each spoon into the chocolate, filling the bowl of the spoon, level the surface and set on pad/paper to cool. Check out a very efficient way to lay out the spoons. You'll be glad you did.
4. Next, melt the white chocolate as directed and place into decorating bag or ziploc baggy. If using the baggy, make a small snip in the corner for piping. Careful, the chocolate is HOT!
5. Since you laid out the spoons in tidy rows, it's now very easy to pipe decorative accents on your spoons. Be generous with the chocolate!
6. Before everything sets, add the baking sugar, sprinkles, etc.

7. Allow to harden for an hour or so (do not refrigerate or the chocolate with discolor), then package up real nice.
I forgot to take a picture of my finished product, but here's an idea of what your spoons can look like:


3 comments:
I think I am going to make some of these....Thanks for sharing!
lOVE those chocolate spoons! You have inspired me. I wonder if you can make honey spoons, do you know?
My DIL is great for giving homemade gifts and I loved it when she made me the spoons. thanks for all the links.
Post a Comment