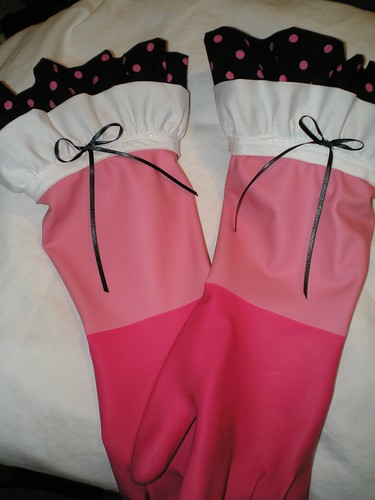
 Gloves Tutorial:
Supplies: Gloves, leftover apron material, leftover trim and coordinating ribbon
The gloves are easy-peasy, just a bit finicky. Purchase Playtex gloves in a color that coordinates with your apron. Then cut two 24"x7" pieces of the (polka dot) material leftover from your apron and fold into 24"x3.5" strips (A). Finished the bottom edges of the strips (I used a zig-zag stitch, but serged would be best). (I corrected the strip measurements once I made them again! Sorry if I frustrated anyone!)
After marking the centers, gathered these strips to 12" which is the circumference of the gloves. Then cut a length of the white ruffled trim to the same 12" (B) and mark the centers. Match centers of both trim, evenly distribute the gathers, and stitch the polka dot ruffle (A) onto the white trim (B) about 1/4" up from the bottom so as to have a clean edge on the gloves.
Next, pin this double trim onto the gloves and carefully baste about 1/4" from the bottom of (B), then stitch along the very bottom edge of (B), being careful to hold the top of the gloves against the trim and not catch in your stitching unintentionally. This is the tricky part, since it does not fit around the free-arm of most machines. Stitch together the raw edges of trim, overlapping slightly.
Form a bow with the coordinating ribbon, hand sew onto the center front of the gloves and you're done!
3 comments:
Love the gloves and love the apron!! I know your swap partner will love it!!
Thanks so much for putting up this tutorial. These gloves are so cute! I'm planning to make a pair for my mom.
What a cute idea! I think I am going to try a pair...
Post a Comment